PicToS3 Media to Cloud Uploader (MCU) is a powerful new WordPress plugin designed to streamline the process of uploading large quantities of images — especially for creators working with ZIP files containing chapter images for books, novels, or manga. Whether you’re managing serialized content or building a visual archive, PicToS3 saves time by automating extraction and upload workflows.
In this tutorial you will learn how to easily use this plugin.
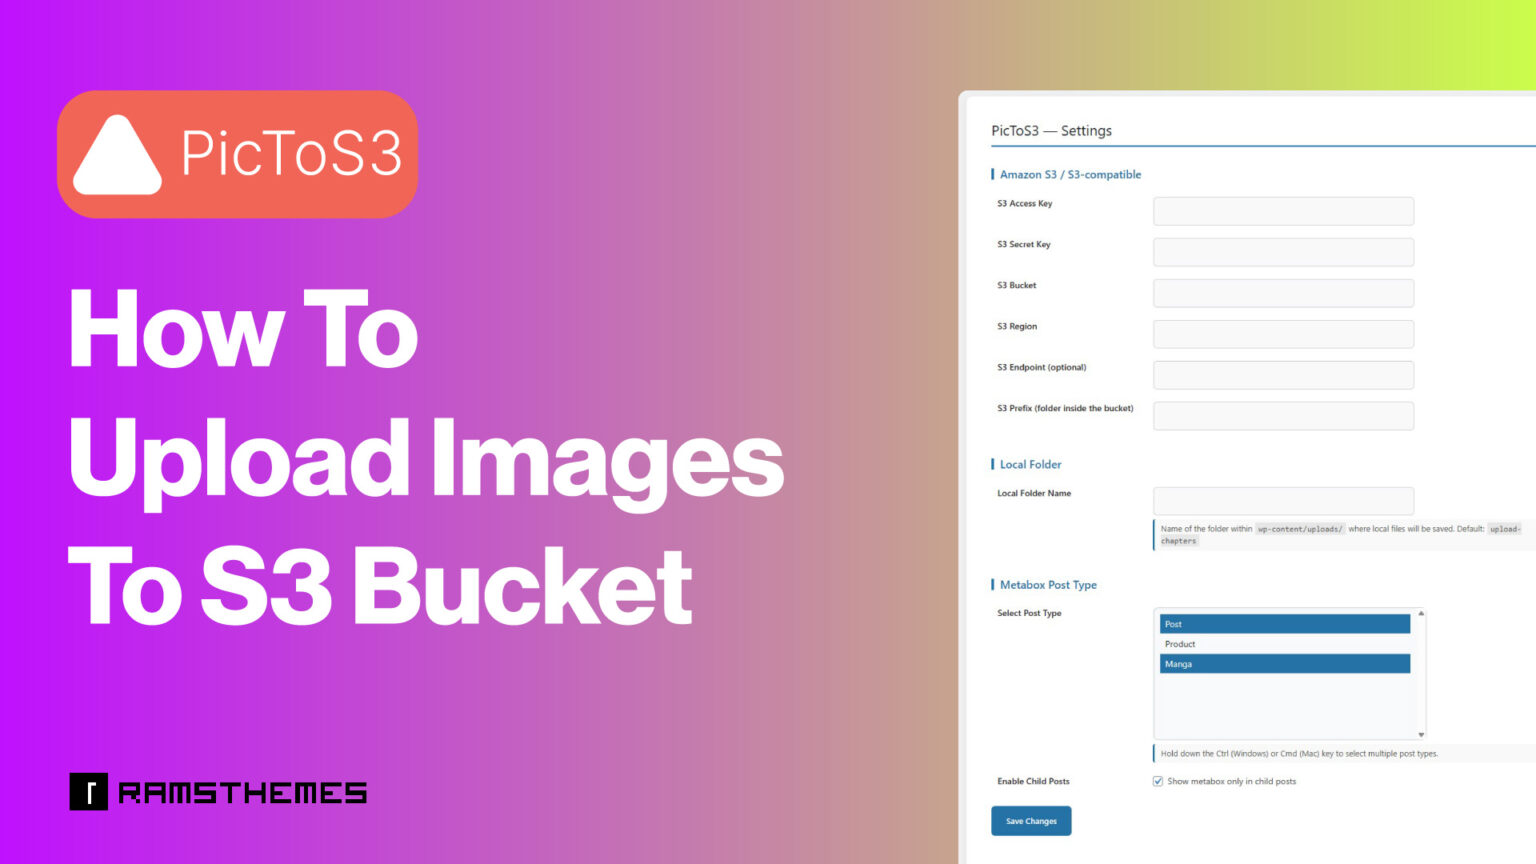
1 – Configure Settings

Two Upload Modes: Local and S3
PicToS3 offers two distinct modes for handling image uploads:
📁 Local Image Upload (Local Folder – Default Mode)
If the S3 credentials are not configured in the plugin settings, PicToS3 defaults to local storage. ZIP files are extracted on your server, and images are displayed directly in the post editor. This mode is ideal for users who prefer to manage files within their WordPress hosting environment.
🪣 Image Upload to S3 Bucket (Amazon S3 – S3 Compatible)
When S3 credentials are added to the plugin settings, PicToS3 switches to cloud mode. Uploaded ZIP files are extracted, and images are sent directly to your configured S3 bucket. This is perfect for high-volume sites or those using Amazon S3 for scalable media storage.
The S3 Bucket and the folder inside the bucket need to be created within the Amazon S3 platform, then you just need to paste the names into the respective settings fields.
Also, you can use two type of bucket statements on the S3 platform:
Public
{
"Version": "2012-10-17",
"Statement": [
{
"Sid": "PublicReadGetObject",
"Effect": "Allow",
"Principal": "*",
"Action": "s3:GetObject",
"Resource": "arn:aws:s3:::your-bucket-name/*"
}
]
}
Restricted
{
"Version": "2012-10-17",
"Statement": [
{
"Sid": "AllowGetFromMyDomain",
"Effect": "Allow",
"Principal": "*",
"Action": "s3:GetObject",
"Resource": "arn:aws:s3:::your-bucket-name/*"
"Condition": {
"StringLike": {
"aws:Referer": [
"http://your-site-url*"
]
}
}
}
]
}
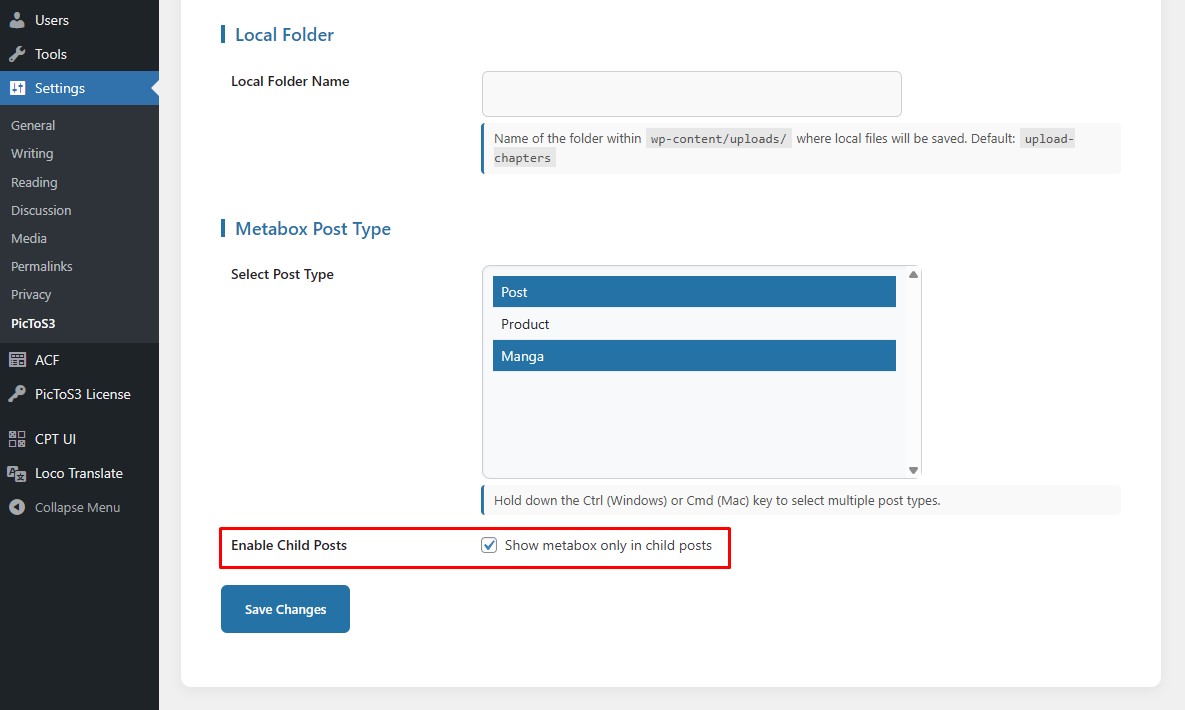
Metabox Post Type
This allows you to display the metabox for uploading in the post types you have registered. You can select more than one.
2 – If you use Post Types
Use Posts or Post Types
By default, common posts are used, but you can use a tool like CPTUI to create custom post types. Once created, they are detected by the plugin and will appear as options in the Metabox Post Type section.
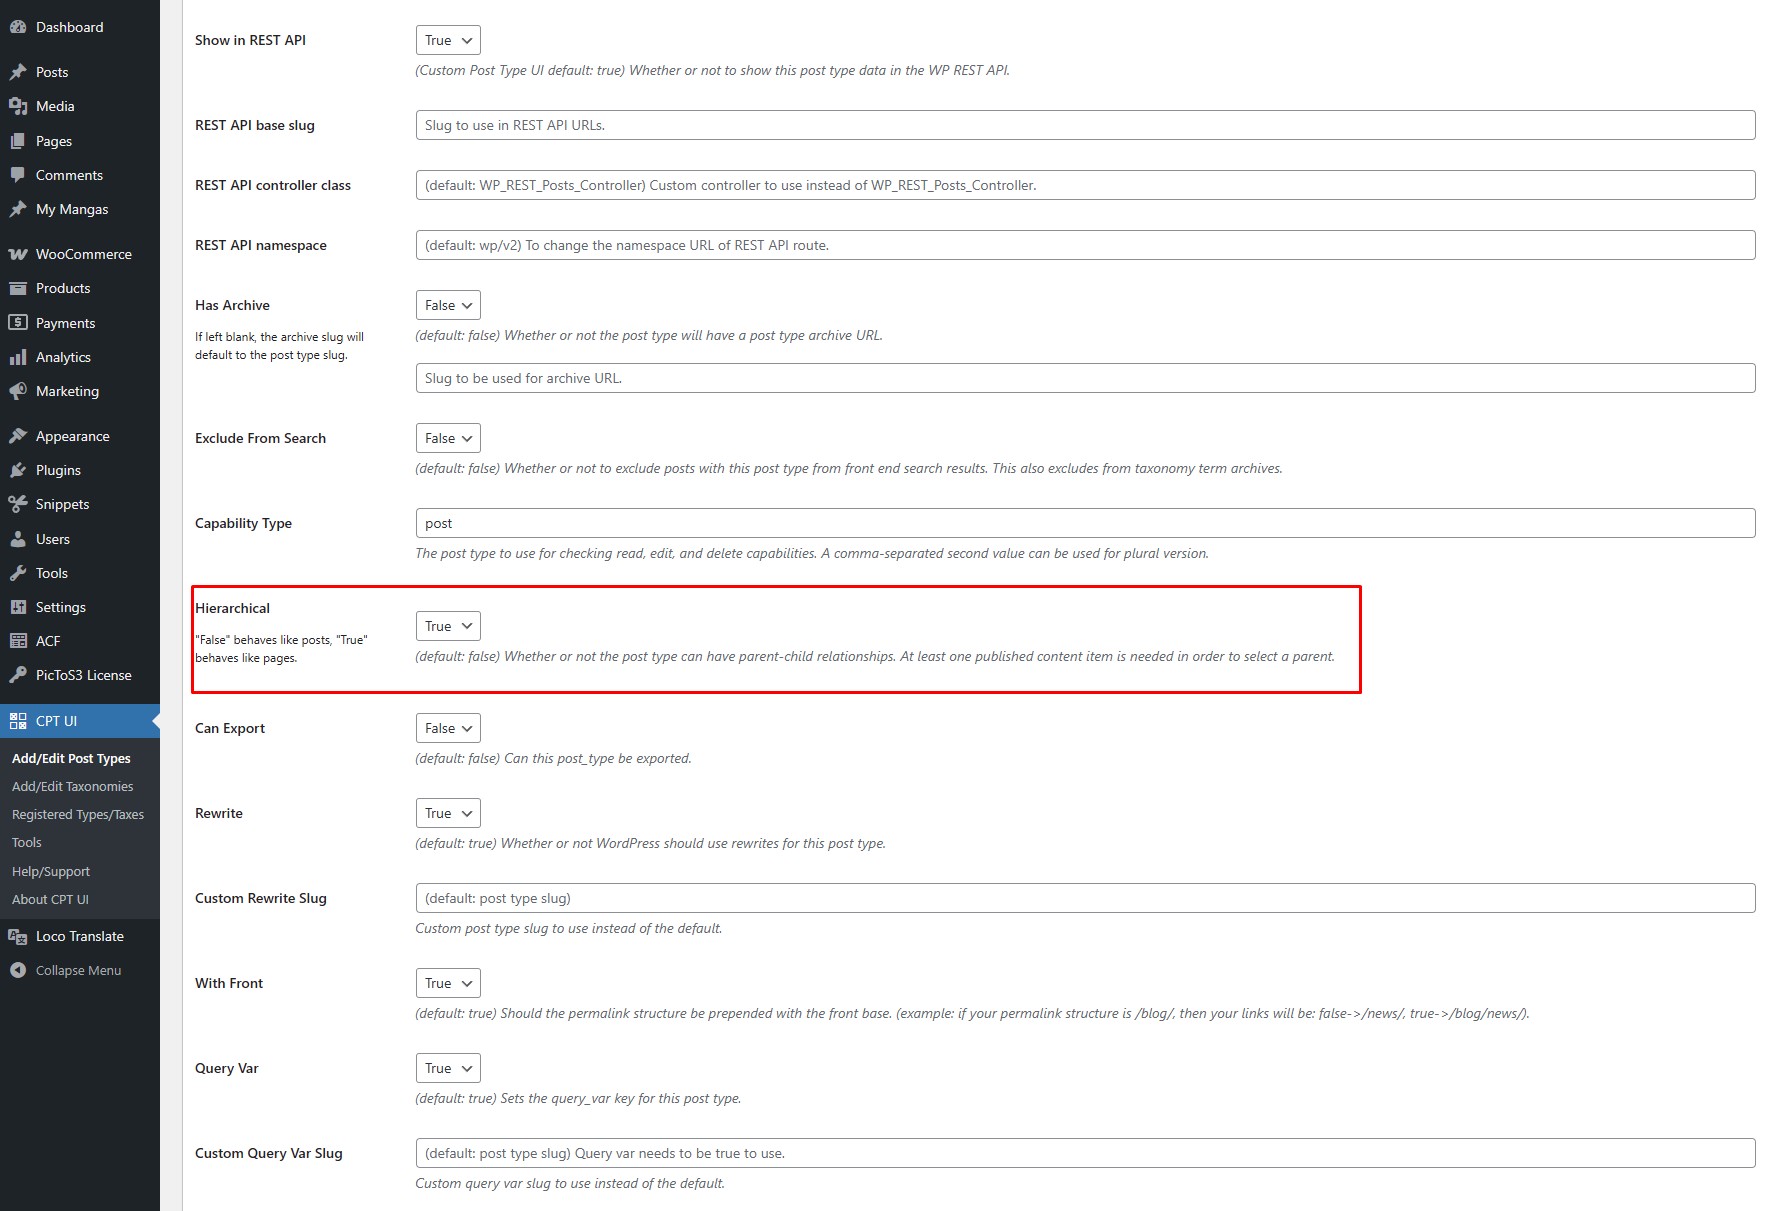
If you’re going to use child posts to better organize your posts, like chapters, make sure to enable Hierarchy when you create your post types.
After that you can Enable the Child Post option:
When enabled:
- The plugin activates an upload metabox for child posts
- Images are uploaded to a folder named after the parent post
- Subfolders are created using the child post’s name and ID
- This structure works seamlessly for both local and S3 uploads
3 – Create the Post
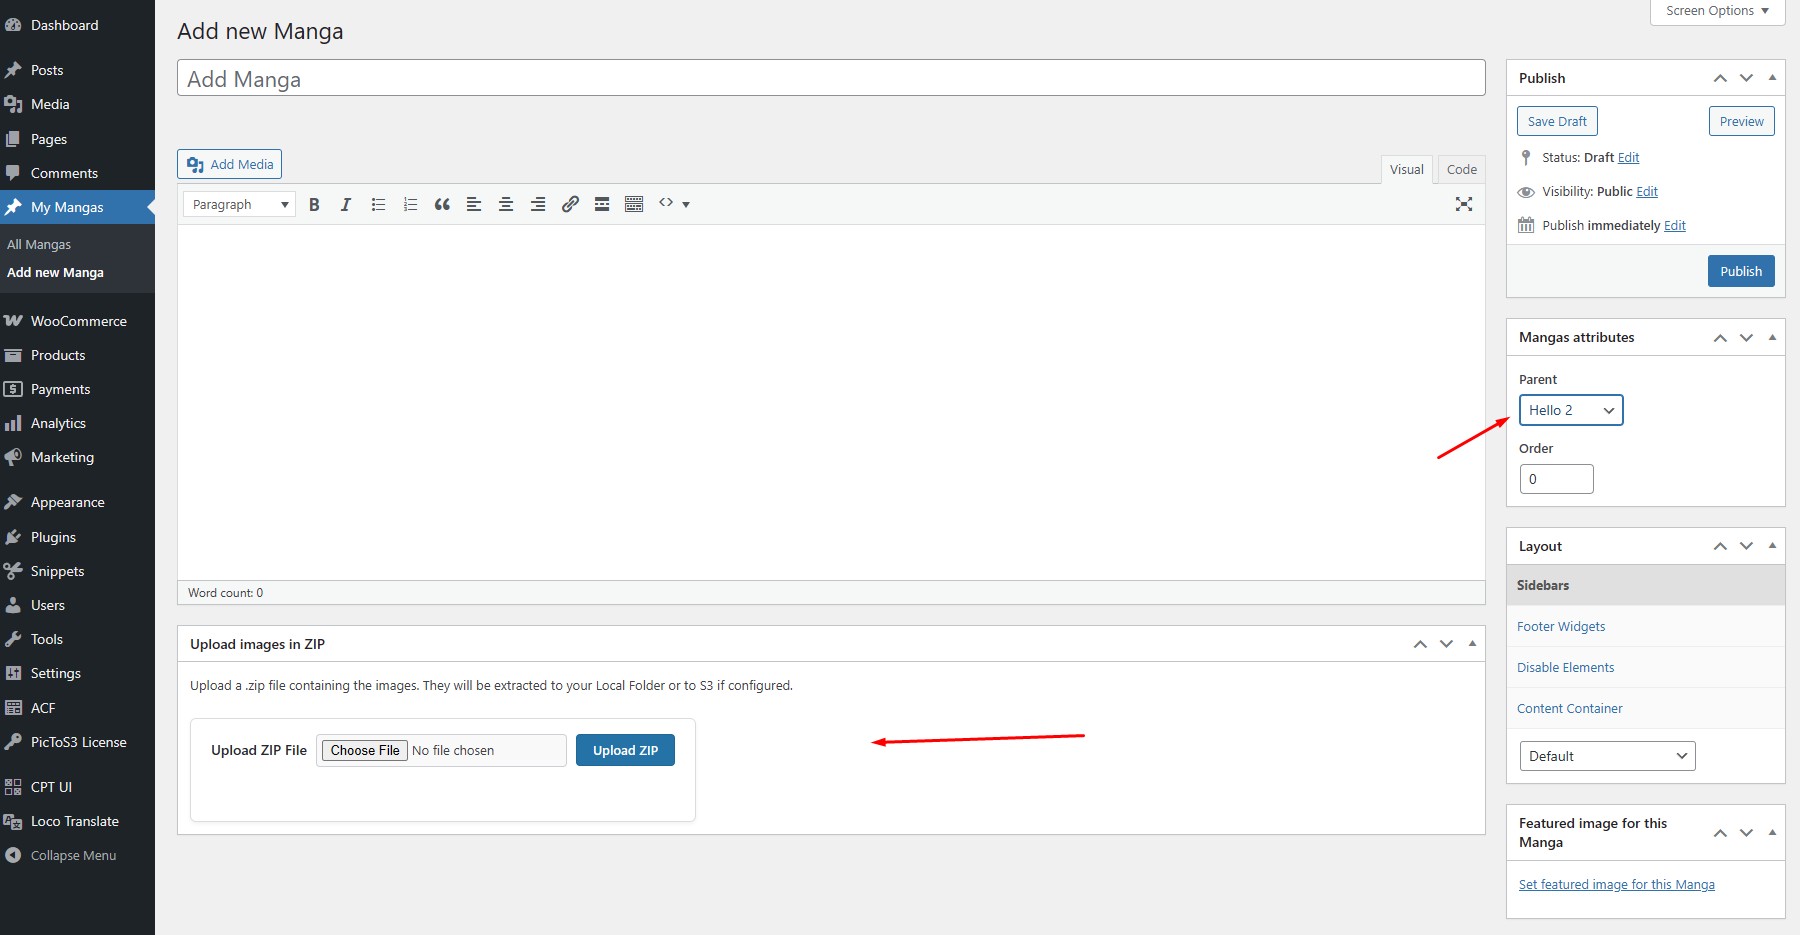
Create a new post (in example, using “Manga” post type)
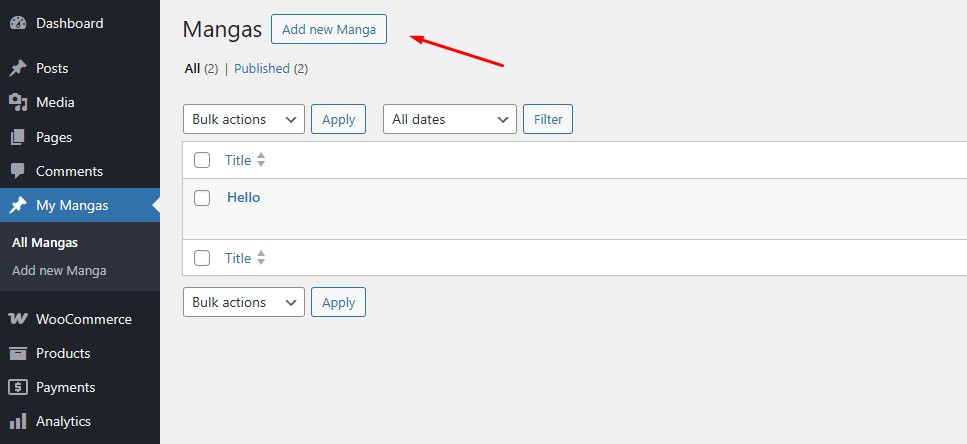
Create the Parent Post (example “Hello” or “Hello 2”) and Save.
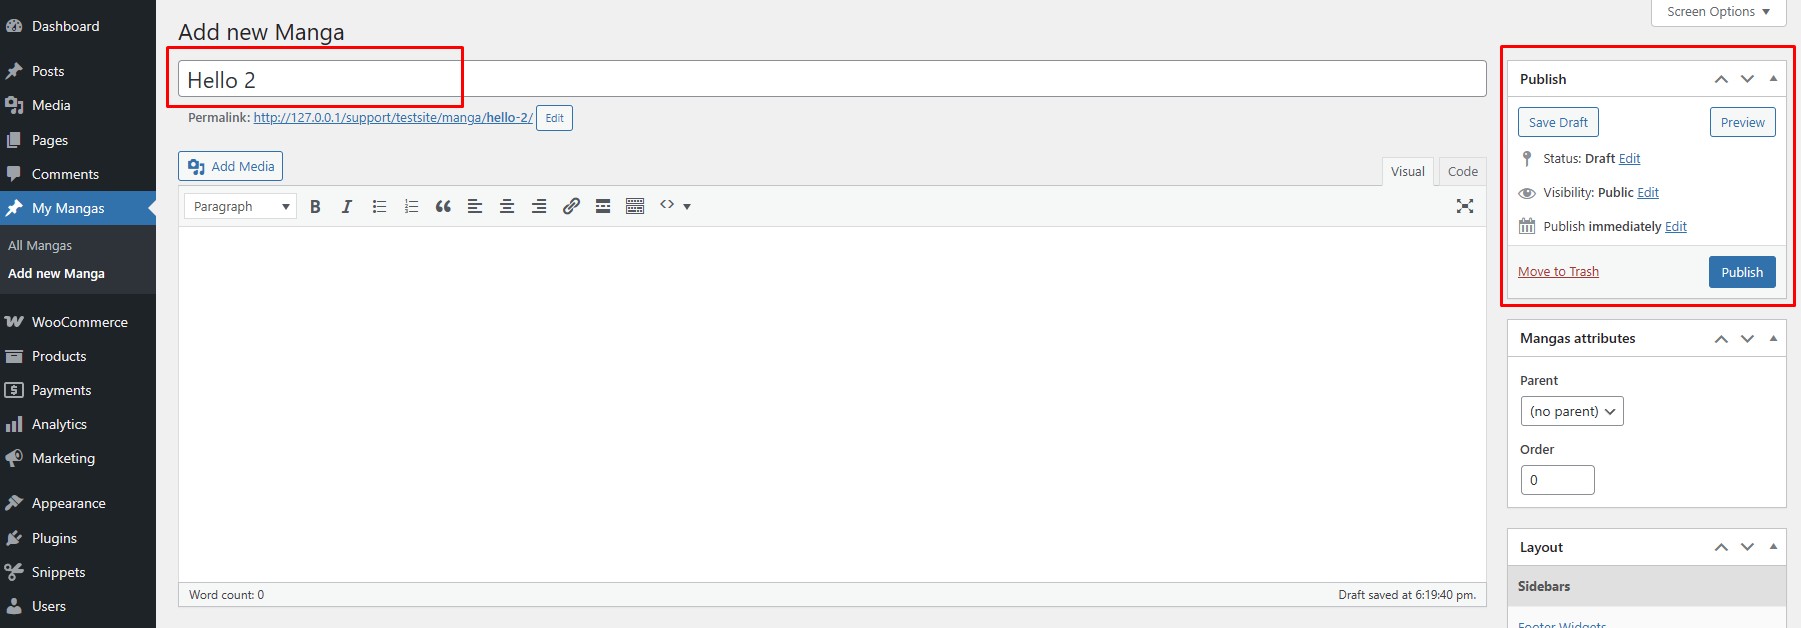
Now create the Child post (“Chapter 1” or any name) in the same way before, but selecting the Parent on the side box. When you select the Parent, the plugin Metabox automatically appears to allow the zip uploading. Then Save.
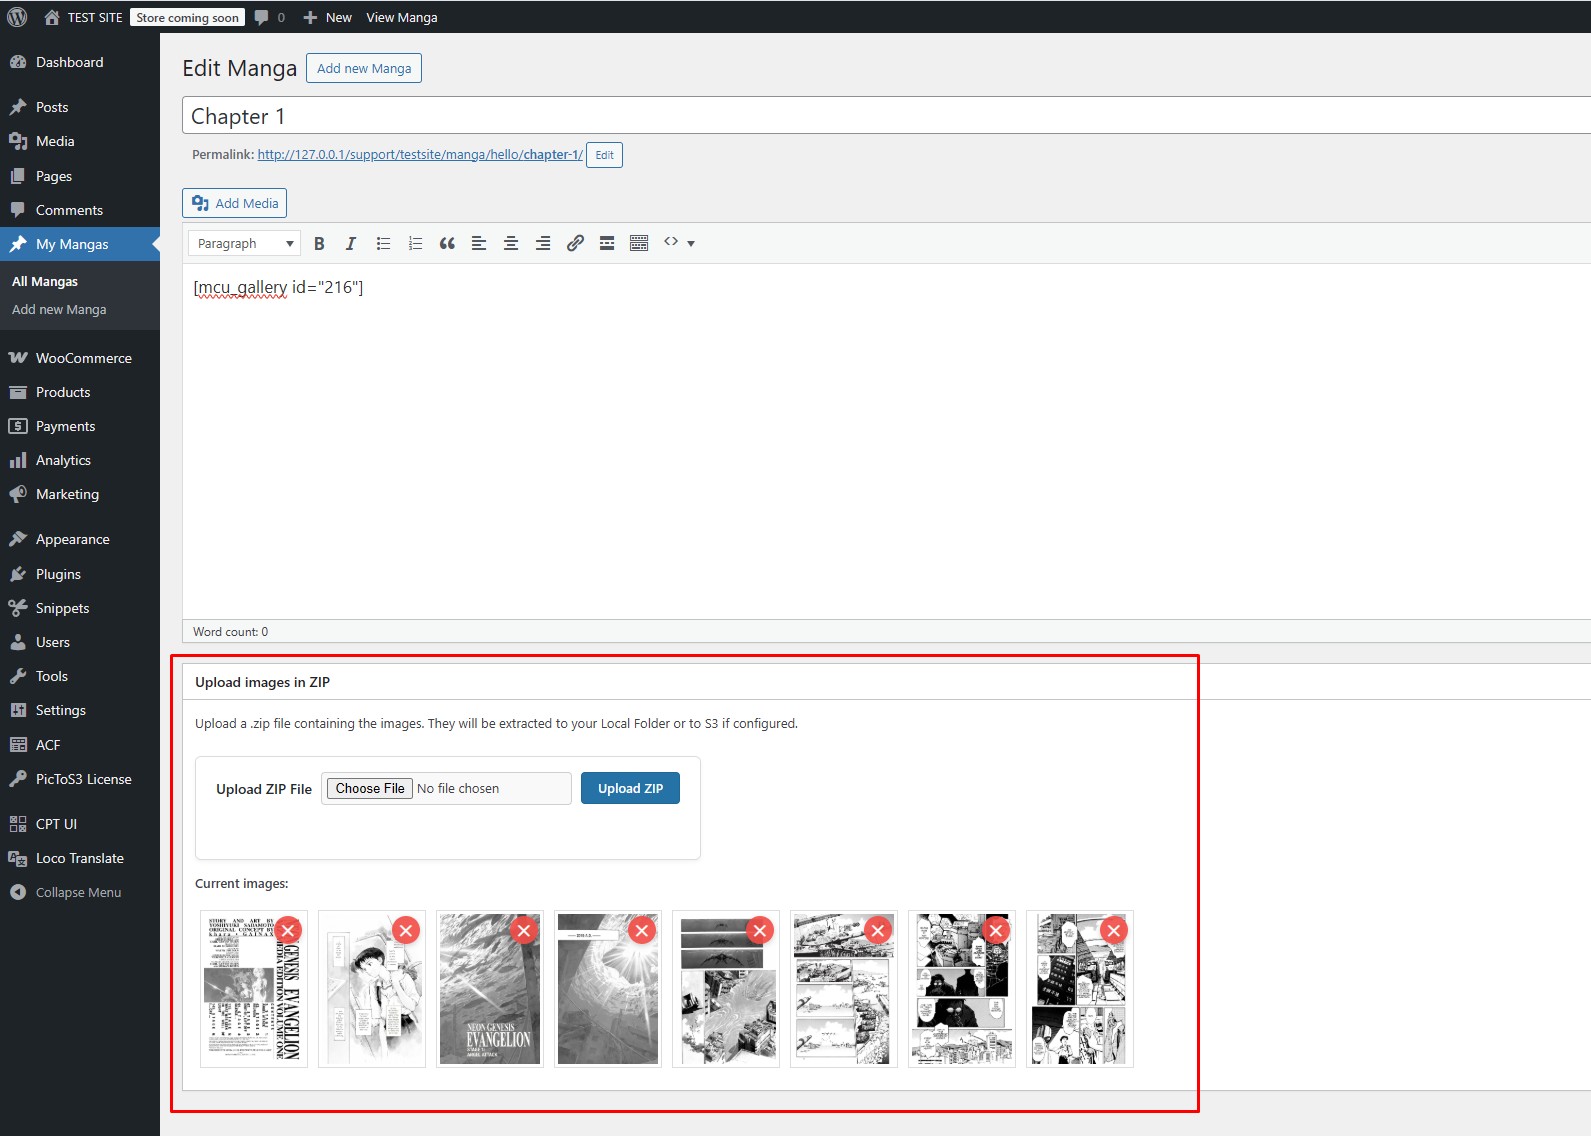
After Save, now upload the zip using the metabox and wait a little bit. Images are displayed in the Metabox and can use the shortcode on content like
[mcu_gallery id="yor_post_id_number"]
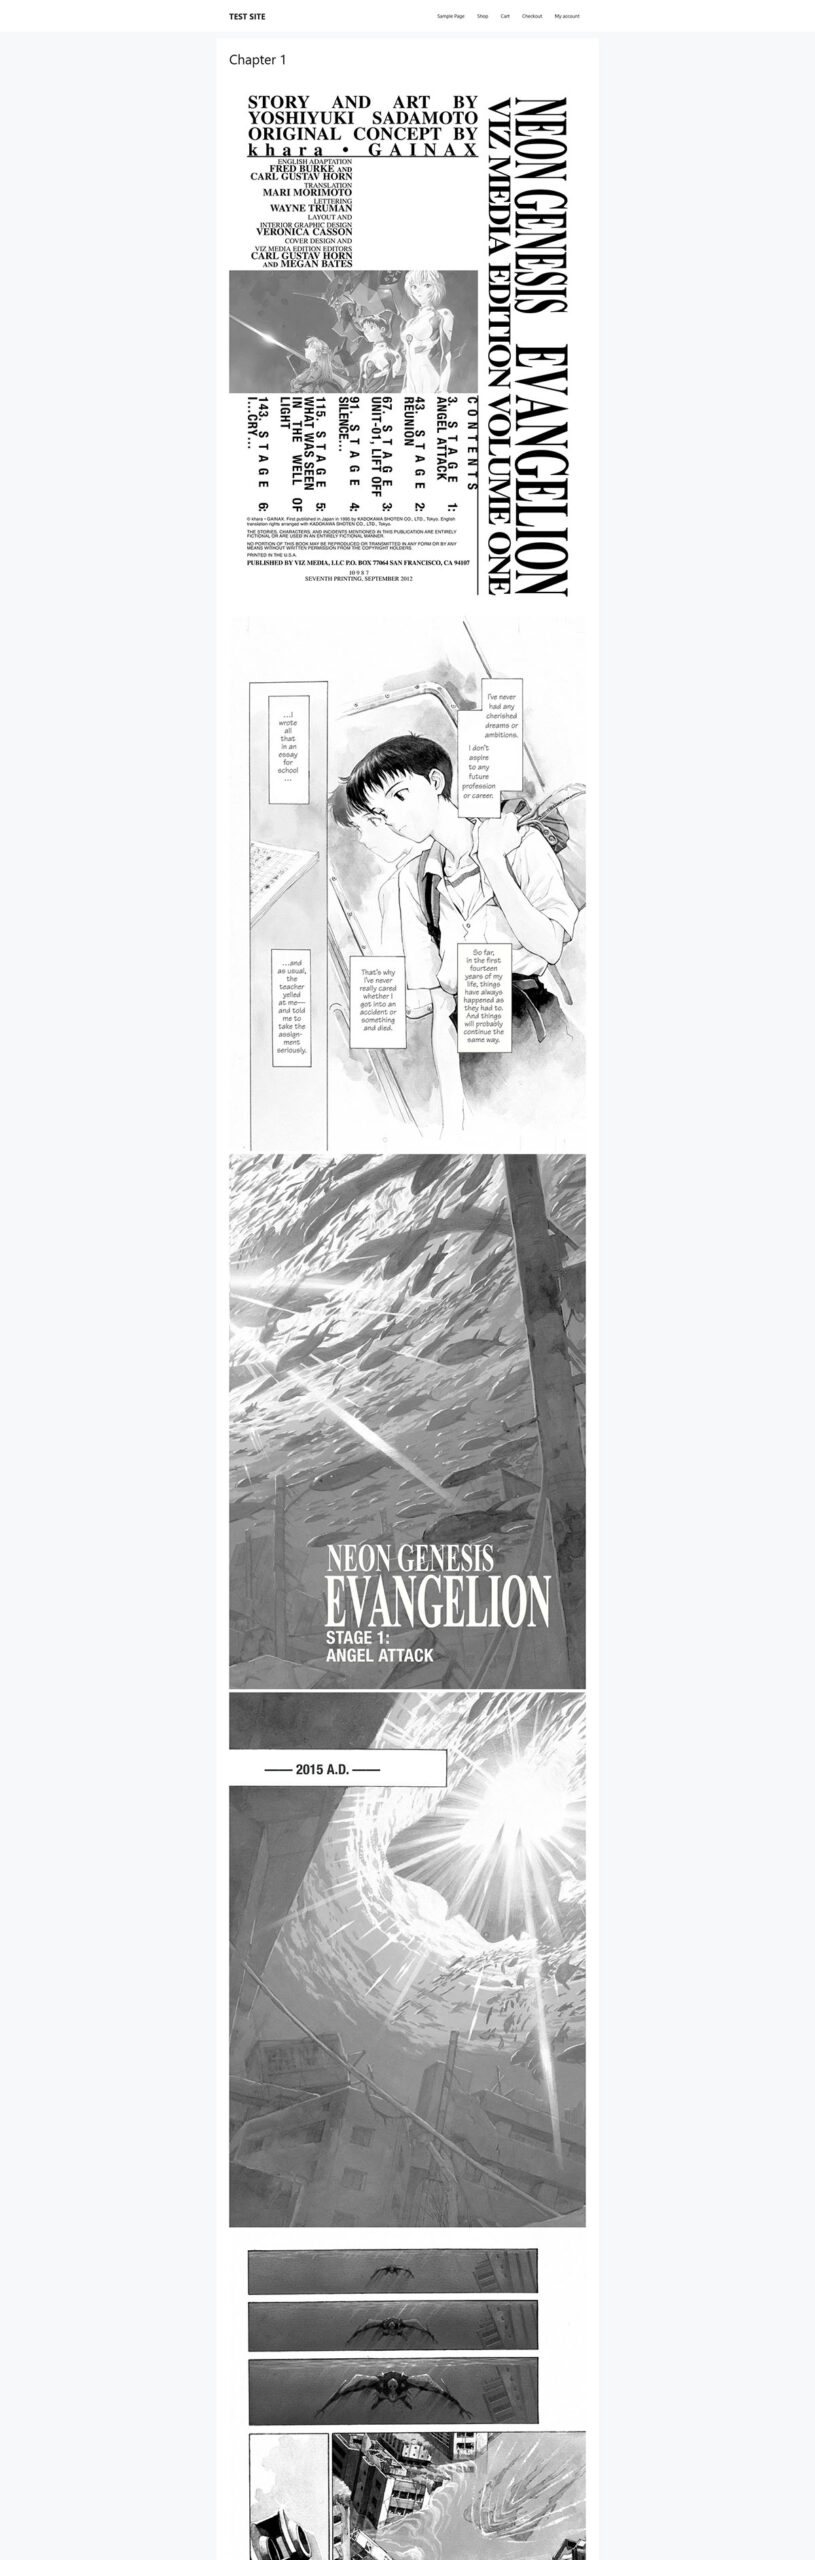
You can save the post, and now you can see the images one below another on frontend
Images also can be deleted directly from the Metabox — whether stored locally or in S3. This gives users full control over their media without needing to navigate external file managers.
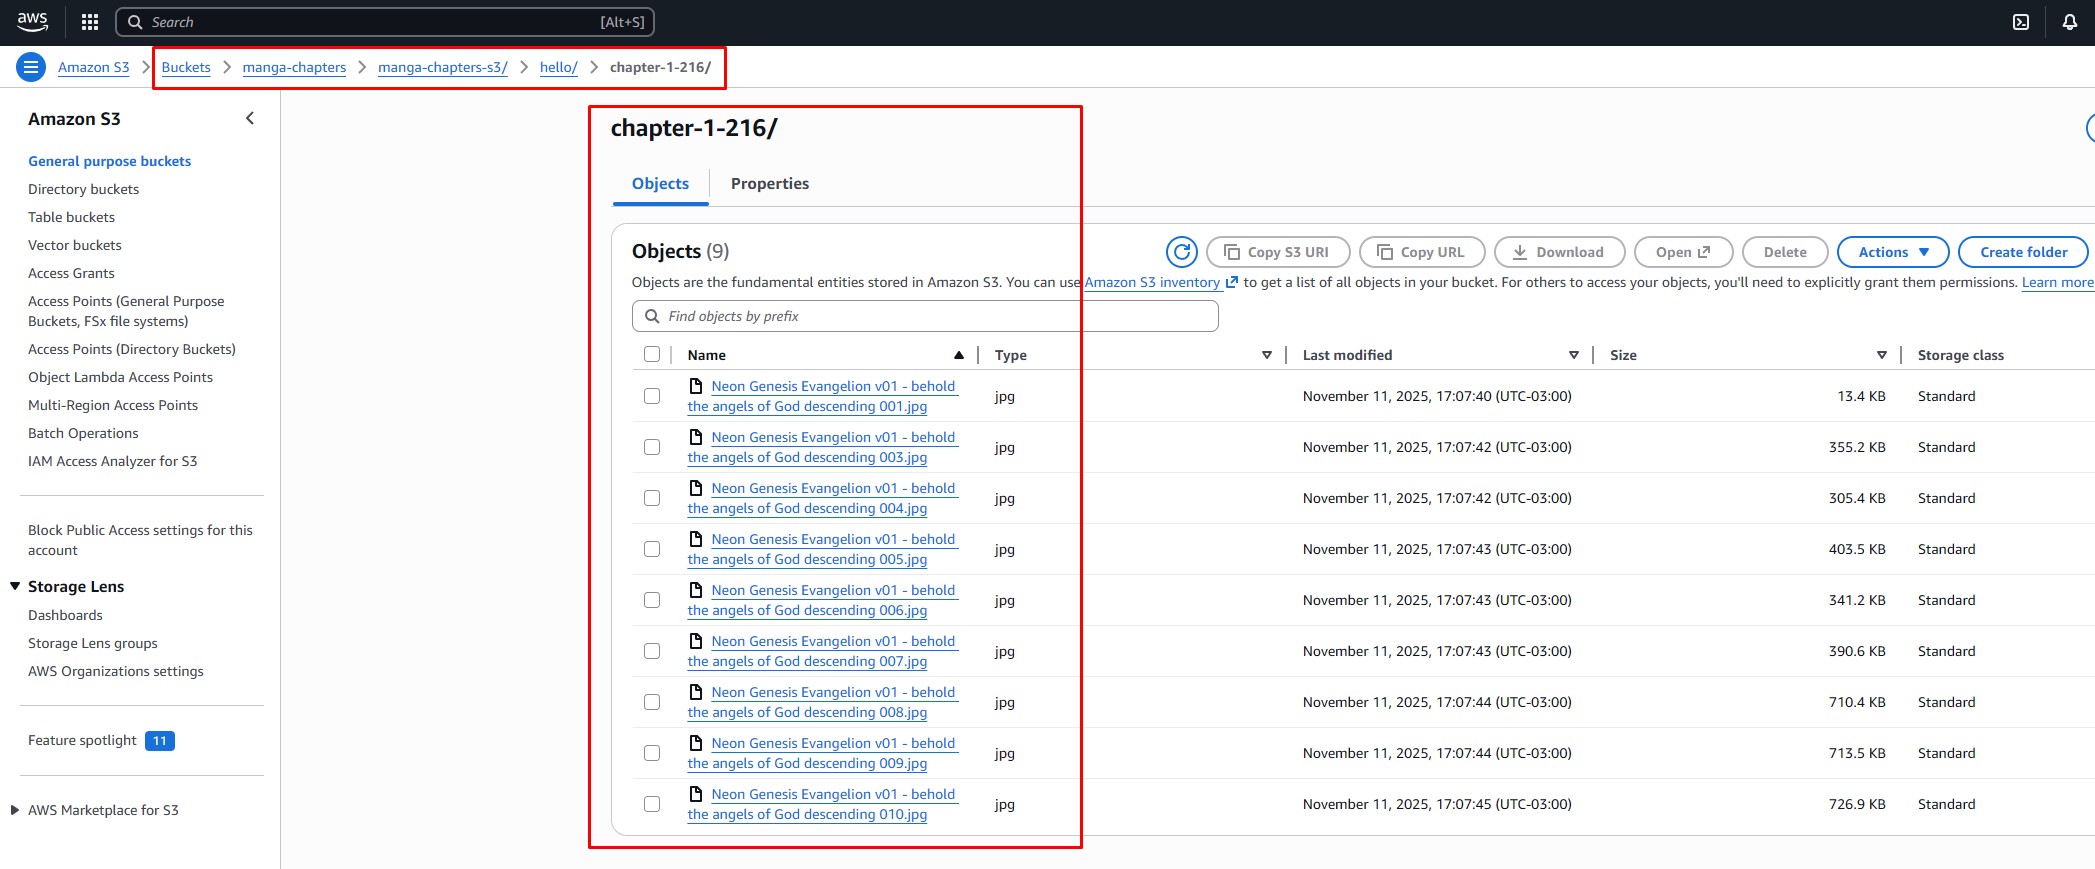
in the example, there are the images automatically uploaded to S3 bucket after the ZIP extraction, some of then was deleted previously:
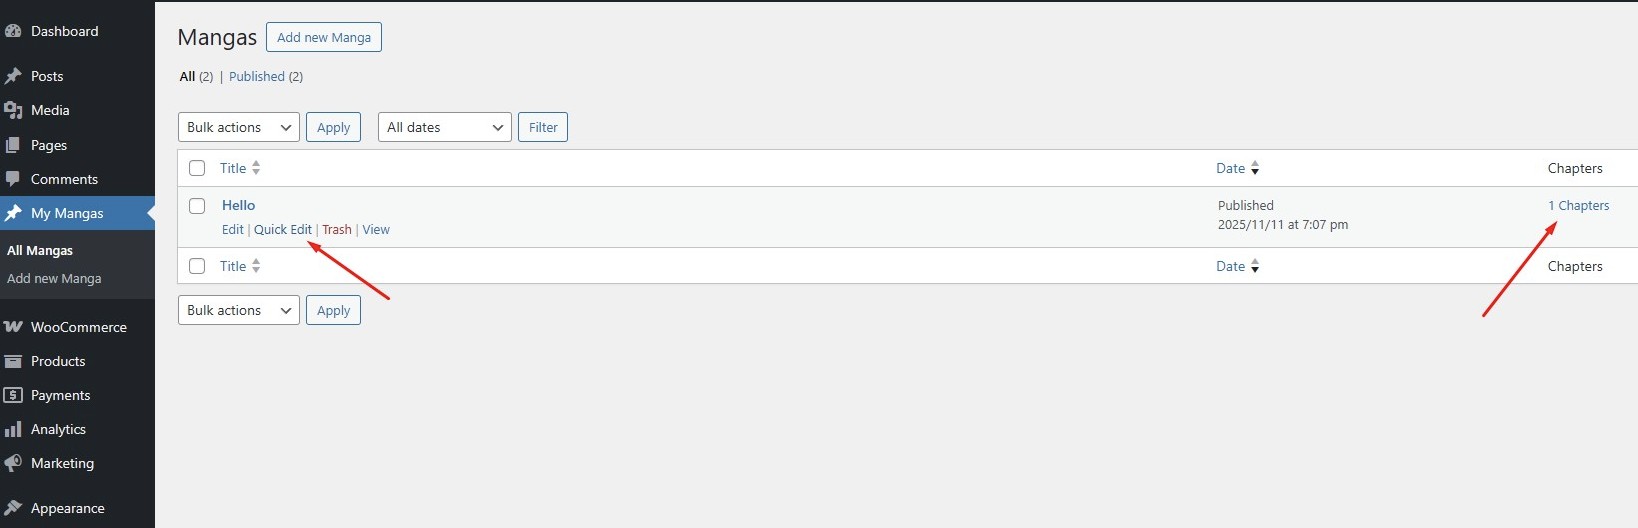
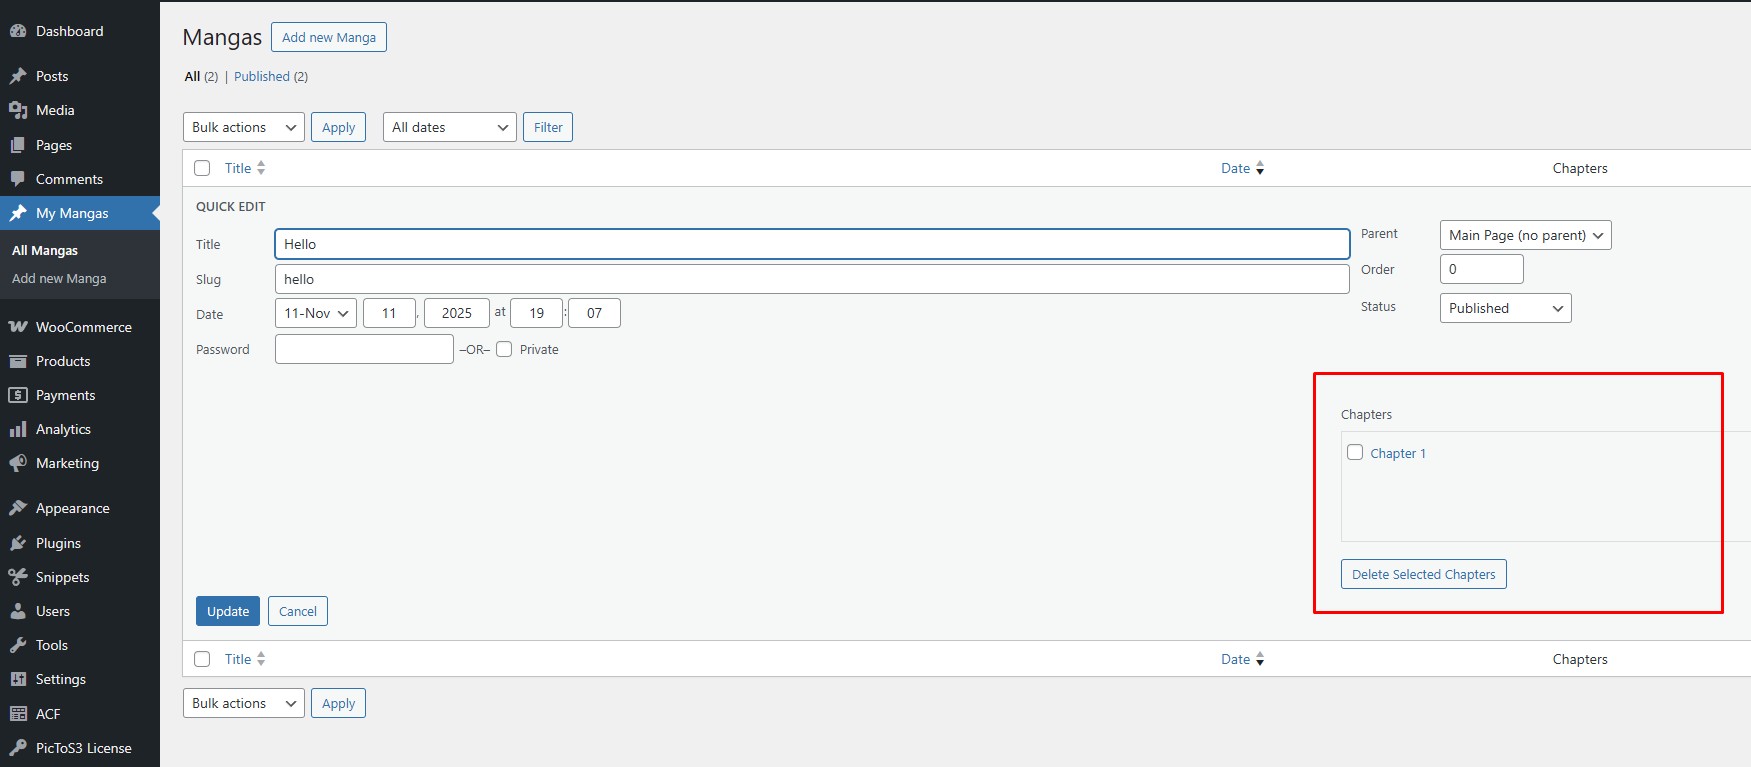
4 – Access the Post Types
For sites with many chapters or child posts, PicToS3 adds a Quick Edit box to access Child posts and shows the quantity of Child posts of the Parent without cluttering the backend. This improves workflow efficiency and keeps your dashboard clean.
If you have further questions, please contact us through the Contact section using the available methods.