It is a one-time fee only. There are no recurring or hidden costs, and your license will not expire.
Installation example
If you make a fresh installation, when you received the zip file of theme, upload in Theme section of WP admin and activate.
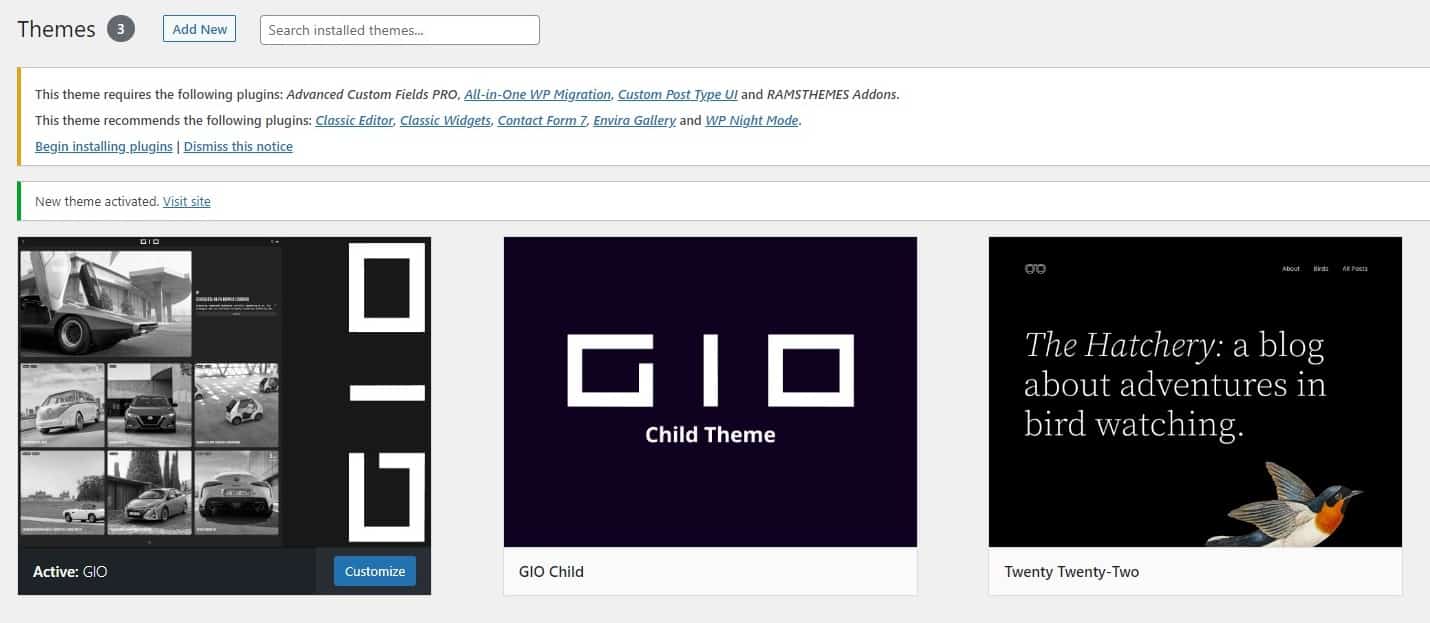
When activate theme, you also activate the core plugins. First do it with ACF PRO. Next you can activate the rest of them.

When do this, go to Theme Settings and hit Update one time. This will do a general write of the main options (the custom fields) of theme, then you can configure the rest of the options.

If you get an error screen or white screen with an error message, probably you have an outdated version of a file. In this case contact us in [email protected], sending the url of your site, and your wp admin and FTP credentials to see in details if anything is lose.
Instructions for import demos are in every documentation of themes, and in our online resource.
In some cases, users get the “stuck” error when importing through All In One WP Migration plugin. Generally this is due to hosting issues. There are many solutions to solve this.
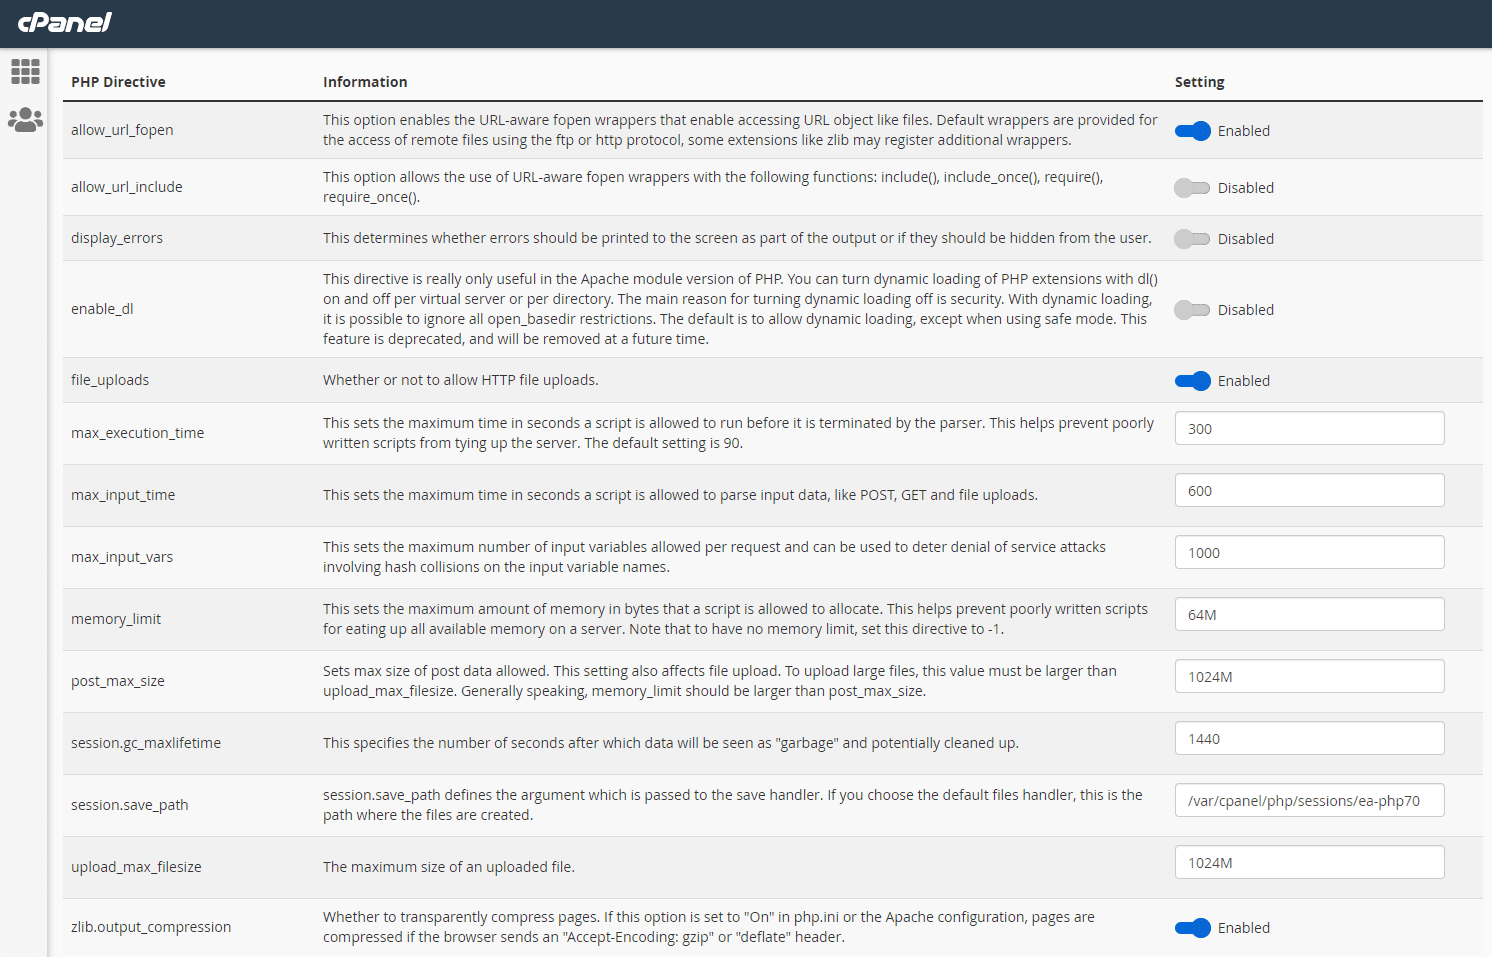
1 – Increase PHP server times and sizes for upload
You can do this in your CPANEL, in the MultiPHP INI editor option, and tweak the values. For example:
2 – Use the “Unlimited extension” of the plugin
If you dont know how to tweak the PHP options, this paid extension allows to remove the upload size limit and enables restoration. Get more info here.
3 – Use “Backups” option
Instead of upload .wpress file directly on wp admin panel, you can upload the file via FTP and restore it through the Backup option of the plugin, with the Unlimited Extension.
How to import Themes with AIO WP Migration
Many of theme updates are the result of requests or suggestions from the users themselves, and the updates are automatic or manual.
That is why we always recommend having a test environment to do tests or checks, and make a backup before do anything; then you can do the update and replicate the proccess in your live site. We always announce updates on our social networks.
IMPORTANT: for child themes activated and files replaced for previous customizations made by users, you (as user or developer or manager of theme/site) can get some bugs or errors when old functions are not present anymore (this is, WP is trying to search function(s) that not exists). The solution for this is simply make changes on the files of new version, placed on the child theme folder; so you should delete the files of old version from child theme folder (when previously you surely make changes of theme), copy the new version files and paste on child theme folder, and make the same changes on this.
To apply theme updates:
Automatic Way:
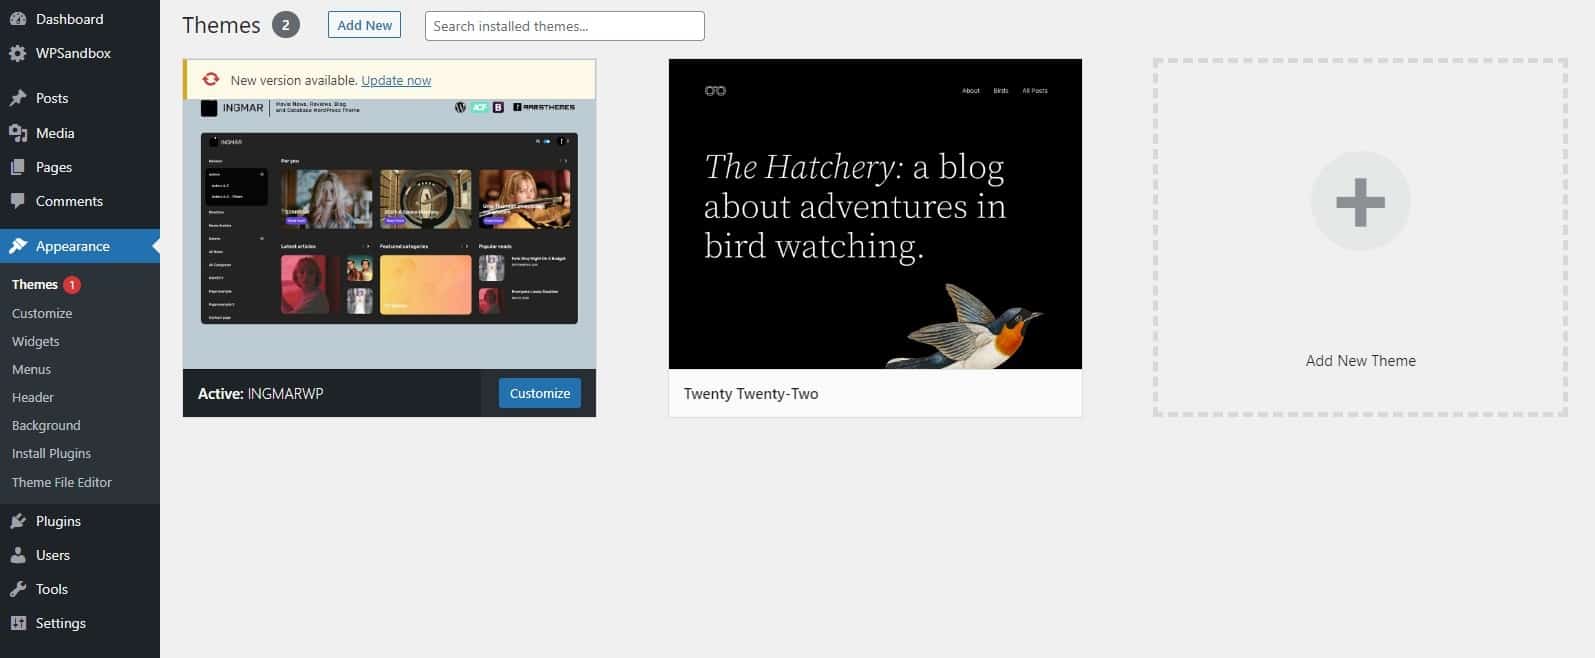
When an update has released, the message appears on the Themes section of Dashboard; simply hit update and the download process starts automatically and replaces all the files in theme folder.
Manual Way:
1 – Open your FTP program (FileZilla, the most used)
2 – Upload the theme files included in theme zip file and overwrite the files in the folder wp-content/themes/nameoftheme
3 – Another clean way is, without entering your site, deleting the files in the folder wp-content/themes/nameoftheme and upload the theme files included in zip. When finished, enter the site again.
The core plugin of our Themes is Advanced Custom Fields Pro. Also Elementor and any another plugins that works together. We include this plugins because it uses a purchased license by us, but we are not allowed to redistribute this personal license. Users must purchase the respective plugin licenses to unlock the features edit capability. To get the premium plugins updates and full access, purchase the original license in author/s plugin website.
You can identify if you have wordpress.com and not a cpanel server hosting with wordpress installed if the login screen is like this

wordpress.com hosting has not options to freely configurate the host and take advantage of commercial themes.
For example, some users report issues because they use wordpress.com plan, causing stucks on the import of the demo with WP All in One Migration, and other plugins that works without problems in other hostings.
In short: wordpress.com plans only serves for basic blogging or ecommerce and themes designed for it. And WordPress installed on a personal hosting with CPANEL allows you to configure all the host options to have a complete WordPress experience with themes and plugins from developers.
The recommended action you can do is get a hosting for a purchased domain and install WordPress on it, a better hosting allows you to control the options of the PHP server, like the described on Theme Demo Import section of his FAQ. Which is mandatory to get a full WordPress experience. The “wordpress.com” account or plan not allows to do something like that.
If you get a hosting, a domain and WordPress installed on it, we will be able to see the configuration of hosting and make the import of the demos of themes if you like.
You can read more about WordPress versions in this article:
WordPress.org vs WordPress.com Plans: do all themes and plugins work?
If you want to enable the edition of ACF custom fields (only for the Bootstrap themes), follow this guide:
How to Enable ACF Pro Menu in WordPress Using a Simple PHP Snippet
If you want to add new fields, you must edit the php files of template manually using the ACF codes for your fields, do this preferently on the child theme folder (previously activating child theme) because you want to do custom changes.
Only do it with the right and proper knowledge. If you don’t understand or have never used ACF, know that it is a custom development task.
The reason why we do not include the editing of the custom fields is because it is recommended to use the bundle in a php file (the file custom-fields.php), intended for end users/consumers without coding knowledge. But with these instructions it would be like accessing an “editor mode” with higher privileges.
If you want us to do a custom field customization job, contact us and we can evaluate and quote it independently.
Remember it is better to have a test site when you try any custom editing, and late replicate in a production site.
About the “Duplicated Custom Fields after updating a Template”, that bug of ACF is common and is caused by the change of the field keys (everytime a bunch of fields are created inside an existing group, the keys change randomly).
So to “update” the keys simply have to enable the ACF Custom fields edit page (see Custom Fields Editing above tab)
You can use that code on Child Theme folder functions.php file or using a Custom PHP code plugin and use this modified functions . As explained, the double bar inside functions indicates the template part should not be loaded and the Custom Fields section must be showed
// ACF CUSTOM FIELDS

function acf_custom_fields_php() {

//get_template_part( 'inc/custom-fields' );

}

// HIDE CUSTOM FIELDS SECTION

function acf_hide_fields() {

//add_filter('acf/settings/show_admin', '__return_false');

}
This enables the ACF fields editing (fields saved on database with the old keys).
Then enter to the ACF field groups screen and delete all
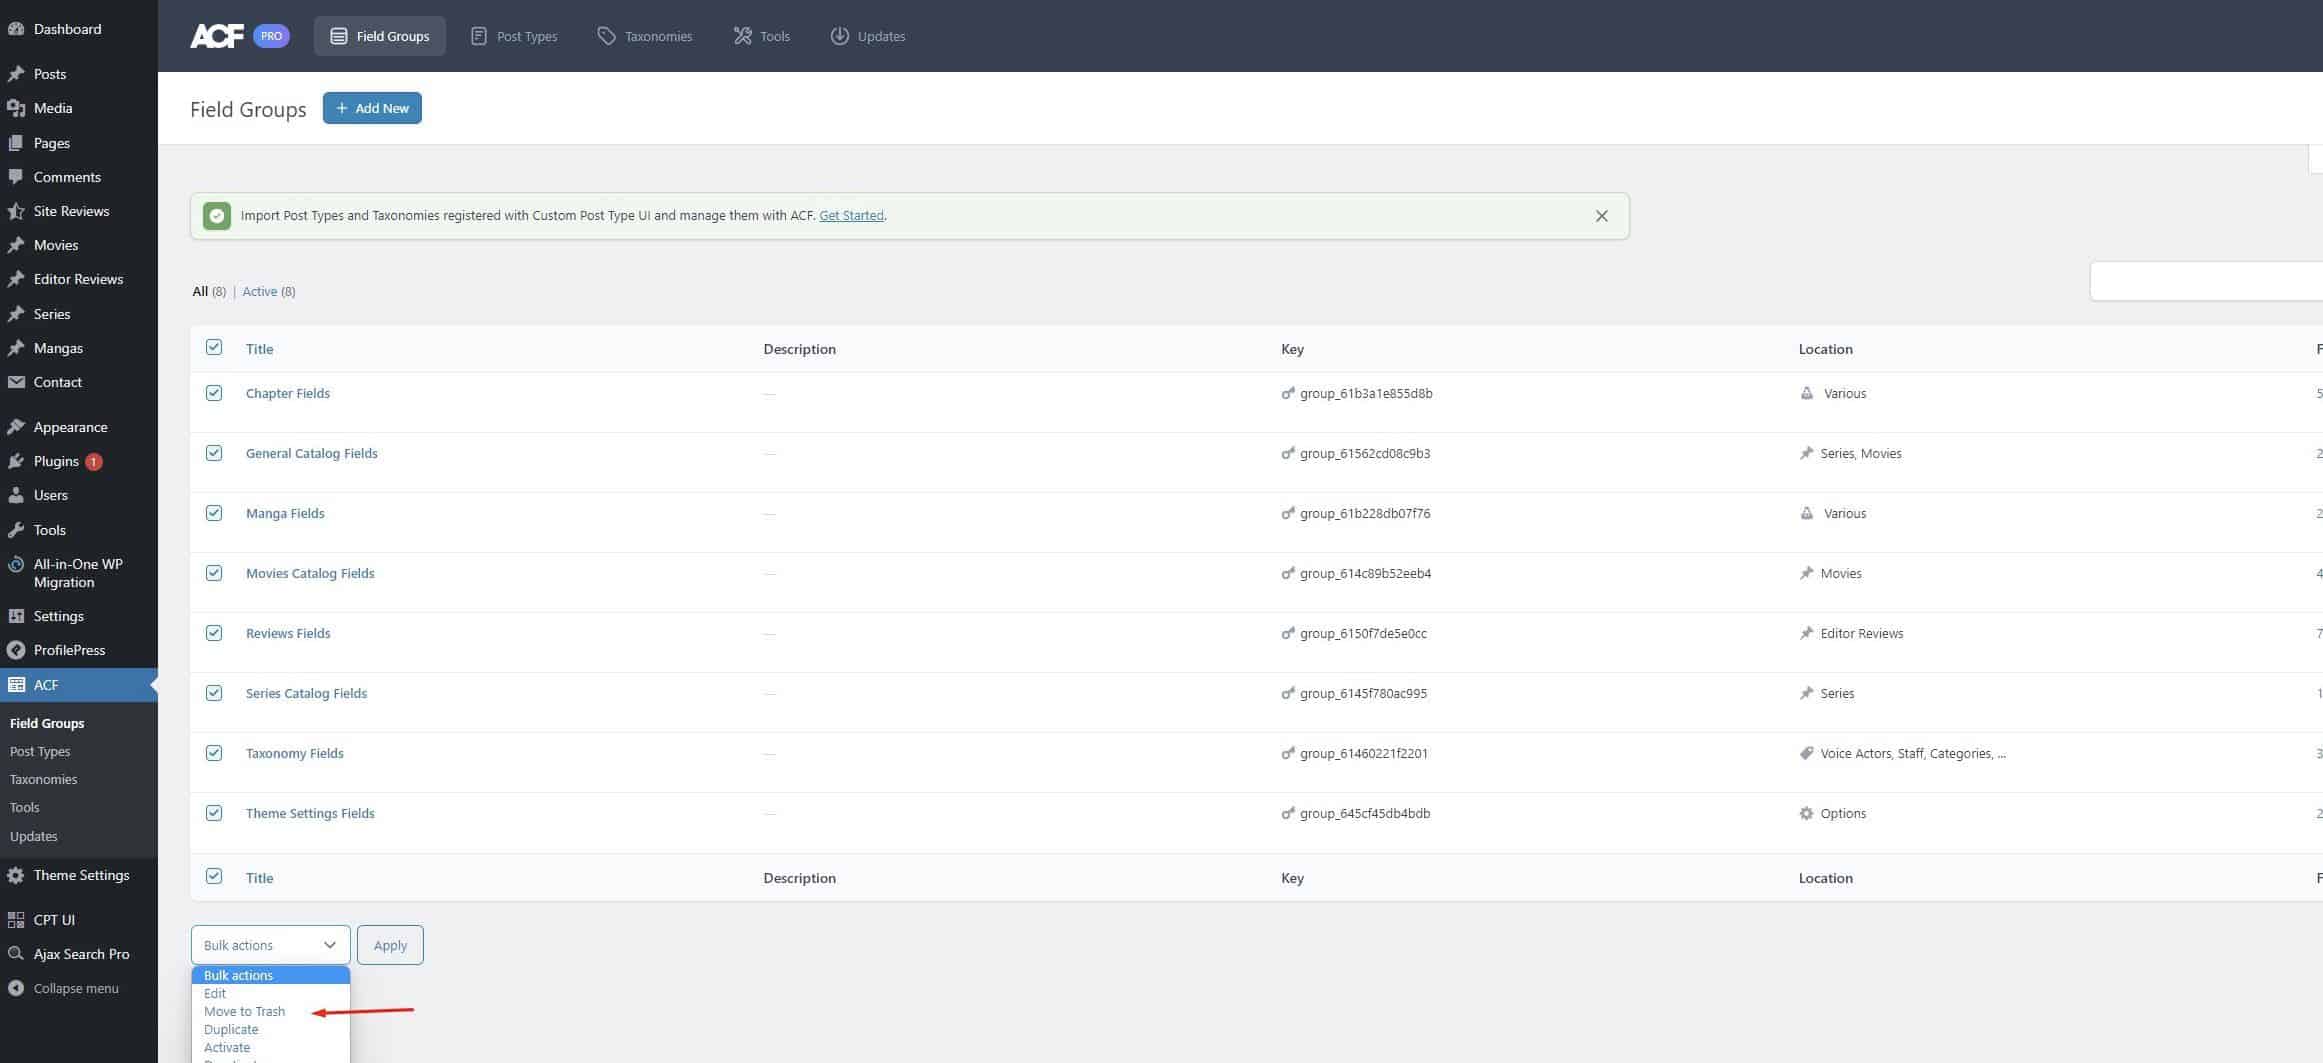
and next import the latest JSON (that contain the latest fields with updated keys)
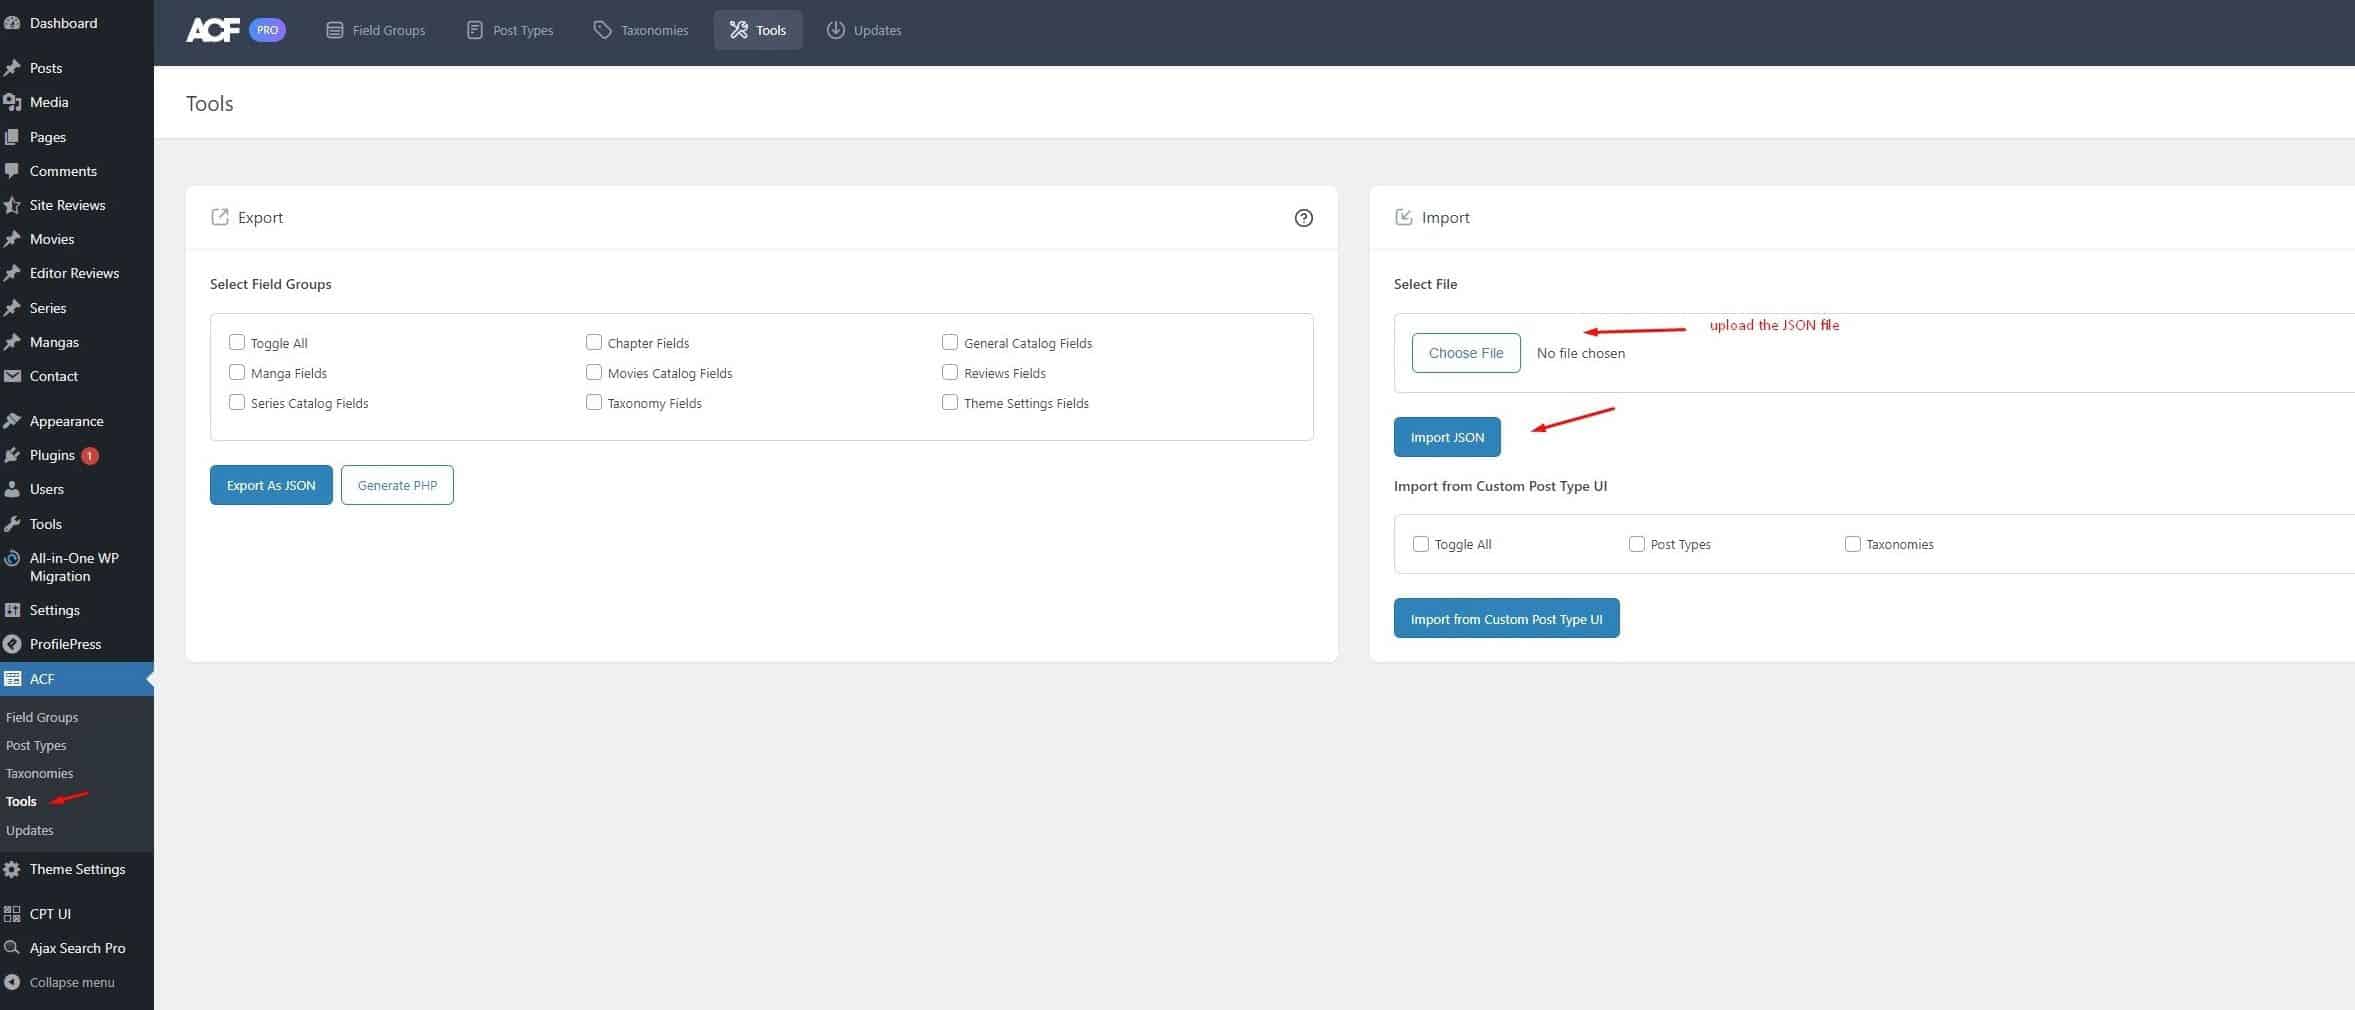
You can ask for the respective Theme JSON file via Support Ticket.
Recommended to do/test first on stage site
Yes, themes are translatable with plugins like Loco Translate or WPML,
For translations with Loco Translate, check this short tutorial.
If you want to create a multilanguage site, WPML is a hard to configure plugin but it is compatible with ACF and string tranlations, also WooCommerce.
What WPML basically does is create a “mirror” of the site in another language, translating each element as a duplicate within the same wordpress installation.
If you need help with the configuration, contact us on [email protected]. If you want us to do the job or any other order or related work with WPML, if it is possible to do so, it will be quoted with an extra cost depending on the work type.
🟢 What does Support include?
Support covers simple requests as: install demos and answer of basic theme functions. If users find bugs o errors, they must report it on the same ticket, correctly detailing where it is or when and why it occurs (send screenshots or screencast videos). The corrections/fixes we try to do it at the moment during working hours, or the next day.
🔴 What does Support not include?
Support does NOT include personalized guides/guidance on external plugins (“how do I do this with this plugin”) or help such as “how to do this with Elementor, how do I adapt the theme to this thing i want to do” or “help me do a certain task”, since those are cases of custom paid tasks.
🟡 Time
If you contact us during unavailable hours, you will receive an automated message and we will respond once business hours begin again. This will depend on the time difference between countries.
If they are more specific requests, customizations (including the use of Child Themes, custom CSS styles, custom codes, custom template files, use of APIS, modding based on plugins etc) or radical changes, if we are in a position to make them, we charge an extra fee via PayPal.
Working hours not include weekends, and requests begins on mondays. Try to be clear in the descriptions of issues, and send screenshots (lightshot links or stremeable videos) and urls for allow us get detailed information.
We NOT provide SEO services, speed improvements or servers/hosting assistance, it’s NOT our specialty. We NOT give support for third party or external plugins, only for OUR Templates.
For a more comfortable and fluid communication, send us a mail with questions directly to [email protected]
🟠 My plugin feature stopped working after updating a plugin. Is this a theme issue?
Not necessarily.
Themes and plugins run inside your WordPress environment and share the same execution context. When a plugin update introduces changes, conflicts, or errors, it can affect other functionalities on the site — even if they were working correctly before.
If the same theme/plugin works correctly on our test installations or other sites, the issue is environment-specific.
🟠 I reverted to an older plugin version and it works again. What does that mean?
If reverting to an older version resolves the issue, this clearly indicates that the problem originates from the updated plugin itself, not from the theme.
In such cases, the correct course of action is to:
Contact the plugin’s developer
Report the issue to their support team
Wait for a compatibility fix or update from them
🟠 Does RAMSTHEMES provide support for third-party plugins?
No.
We do not provide support, fixes, or licenses for third-party plugins developed and maintained by other authors.
Each plugin:
Has its own codebase
- Its own update cycle
Its own support channel
Its own licensing terms
Any issues related to those plugins must be addressed with their respective developers.
🟠 I can’t contact the plugin support because I don’t have a license key. What should I do?
Plugin licensing and support access are entirely managed by the plugin author.
If a plugin requires a license for updates or support, this is independent of the theme and outside our control.
Theme authors cannot grant, transfer, or validate licenses for third-party plugins.
🟠 Why does the theme work on your site but not on mine?
Differences may include (but are not limited to):
Caching plugins (Redis, LiteSpeed, WPRocket, etc.)
Server configuration
PHP / MySQL versions
Other installed plugins interruptions
Custom code or modifications
Because of this, we cannot diagnose or predict behavior caused by external plugins or custom environments.
🟠 What is your responsibility as theme author?
Our responsibility is limited to:
Ensuring the theme works as described
Providing support for theme-related functionality
Fixing reproducible issues caused by the theme itself
We cannot guarantee compatibility with every plugin update or custom setup.
➡️ Summary
If:
The issue appears only after a plugin update
Reverting the plugin fixes the issue
The theme works correctly elsewhere
Then the issue is plugin-related and must be handled by the plugin developer.
There are some classic and common tips to improve your projects. Every tip is subjective and depends exclusively of the use of platform, themes, plugins and expectations of your project.
1 – Use image compression
Before upload your image files to WP, compress it with a software like Caesium, or online tools like TinyJPG, or similar, or plugins like Imagify or Smush. Another recommendation is to use WEBP image files, but surely you must upgrade your server to a VPS and contact the support to enable the feature.
2 – Cache tweaks
Use FastPixel plugin to improve the server and cache speed, and compress files to get a “search engine friendly” version. Check this article to get more info and the best suitable configuration.
3 – Control loading of WP resources
WP has some resources that are not always used, but they slow down the overall load of projects a bit. You can control the loading of some of its individual components, as well as the plugins, with a tool like Asset Clean Up or Perfmatters.
4 – Don’t use too much content on your sites
Larger pages or “interminable” sliders (Google hates sliders or carousels) with poor image compression may decrease the performance of sites. Try to be quick in the home page, use short texts and present the image content in a nice design way and correct sizes.
5 – Use a CDN
A Content Delivery Network helps to serve site content across the world with a “cacheable” fast version of your project. Most users try the free service of Cloudflare.
6 – Upgrade your server
Using a dedicated server or VPS may be the best solution in the relation of performance and manipulation of some modules that can’t be used in the common shared hosting services. But this require a moderate/high investment of money/capital which depends on the expectations of projects and support/maintenance services by the server side.